
Instant Pot Cheesecake
To watch the step-by-step video… click here
Hello again friends!
I’m so excited to share my Instant Pot Cheesecake recipe with you today!
I invested in my 6 qt Instant Pot Duo in the early fall of 2019 and absolutely love it! Some of my favorite things to make in my Instant Pot are boiled eggs, Chinese dumplings, soups, rice, baked potatoes, chocolate lava cakes, and my absolute favorite…. cheesecake.
In the summer of 2018 I decided I wanted to become a Cheesecake connoisseur. I wanted people to think “Nikki Knight? Yeah I know her, I tried a cheesecake she made one time and it was life changing.”
Okay, so maybe that’s a little extra, but that’s me. I love to become great at very specific things.
So I had started making cheesecakes that summer, about one every week, and let me tell you my jeans were not thankful for this new passion.
When I got my Instant Pot I knew i wanted to try it ASAP. I researched some ideas and mostly wanted to know the duration and pressure levels I’d need to use to cook the cheesecake all the way. I had already perfected my cheesecake recipe and knew I’d just have to cut it in size to fit in the Instant Pot pan.
Now there’s a couple things to note about making a cheesecake in the Instant Pot…
- Baking a cheesecake in the Instant Pot will provide a cheesecake that doesn’t inevitably crack as they often do in the oven. Because the cheesecake goes into the Instant Pot, cooks, and the pressure is released naturally, the cheesecake is able to cool at a much slower rate than if you pulled it out of the oven. I usually let my cheesecake naturally release and stay in the pot with the lid on for another hour before I remove it.
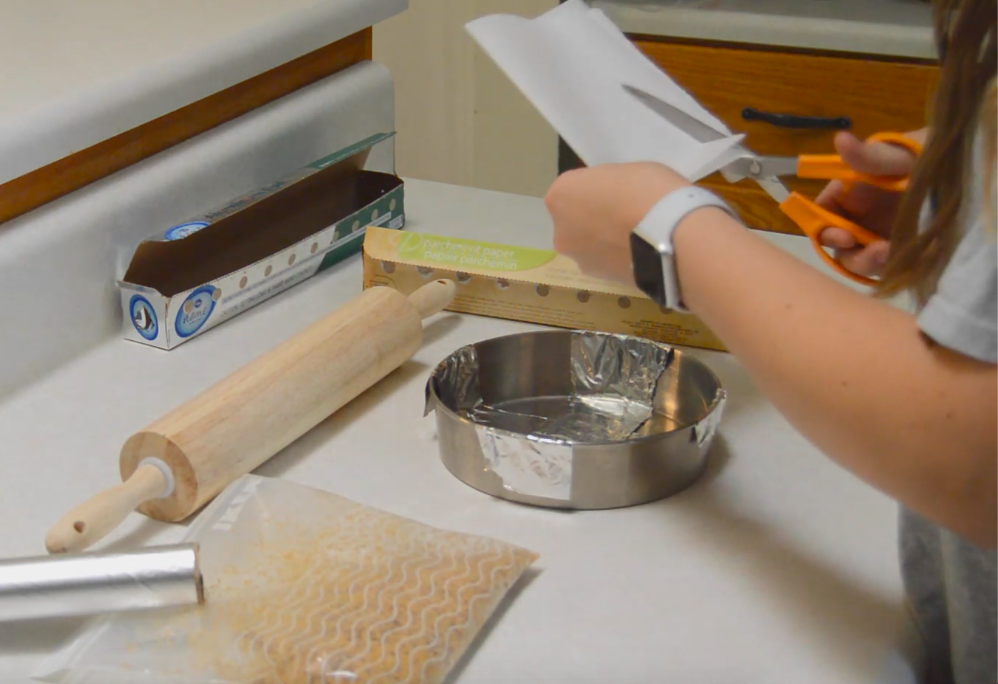
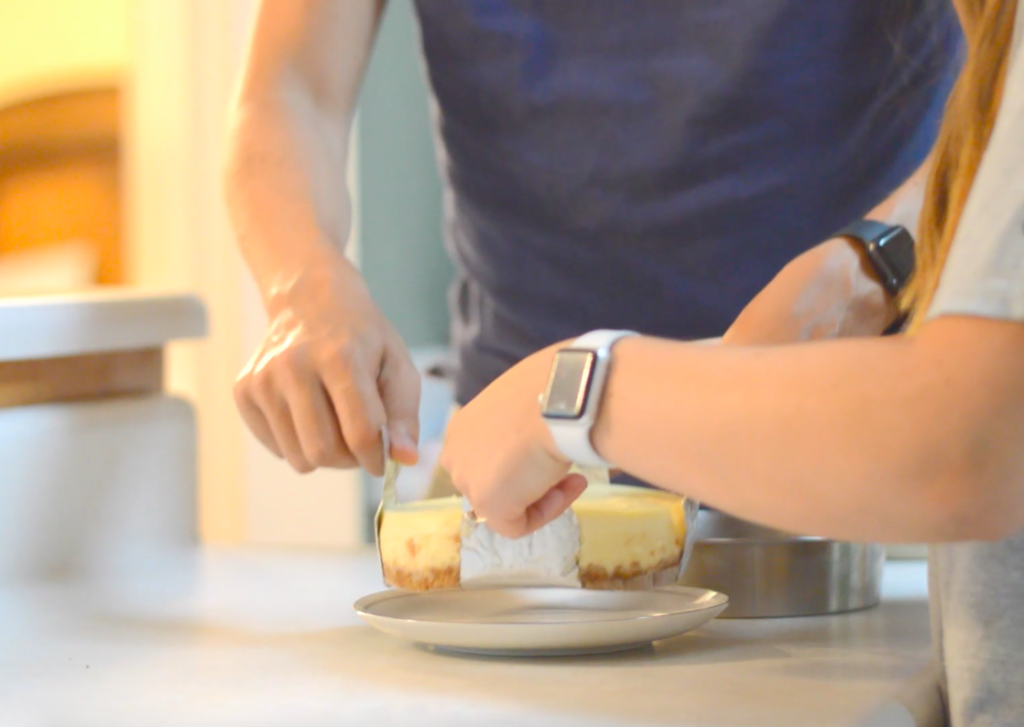
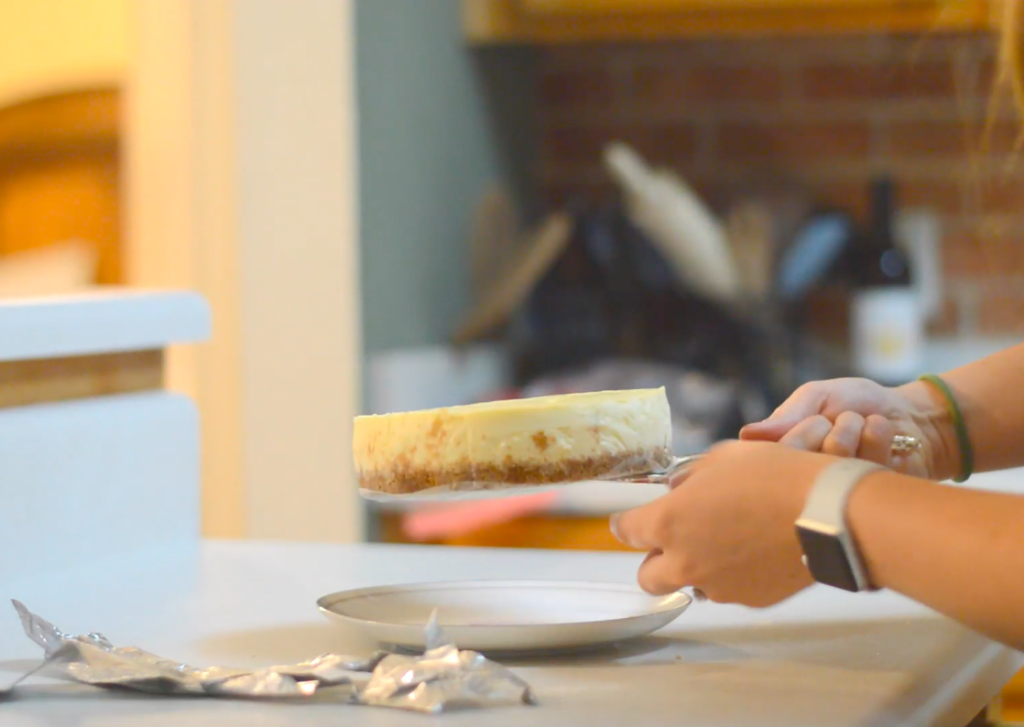
- Springform pans are useful, but not necessary. I have a springform pan for my regular oven-made cheesecakes, and it’s extremely useful for such a large cheesecake. But I haven’t invested in a small enough springform pan to fit in my Instant Pot, so I just use a regular cake pan, and tin foil or parchment paper strips to lift the cheesecake out when finished (Pictures of this process later in this post)
- This is not a full sized cheesecake. Because the cheesecake has to fit into the Instant Pot, only about a 6 or 7 inch pan will fit into my 6 qt. insert. You might have a larger pressure cooker and could experiment with a larger pan, but this is what I do. And let me just say, I think it greatly benefits my husband and myself, because eating an entire, full sized cheesecake between two was neither wise nor easy.
- Your cheesecake will not soak up the flavor that your Instant Pot smells like. My Instant Pot, not matter how hard or how many times I’ve cleaned it, smells like chicken flavored rice. Delicious, but not what you’re going for when making dessert. The first time I made my cheesecake, I was so scared this would happen, and when I opened the lid, I was horrified that it still smelled like rice. But the cheesecake itself didn’t smell like anything but creamy cheesy goodness. Once you refrigerate it, you’ll forget you ever even worried.
- There’s no need to cover the cheesecake inside the pot. I worried about this at first too, with all the pressurized steam inside the Instant Pot, that condensation would build up on my cheesecake. Well, I’m here to tell you that there’s no need to worry. If it does have a little bit of condensation when you take off the lid, you can gently tap it with a paper towel, but I promise, it’s fine.
Now that I’m done with that long rant. Let’s get to baking!
Set out your cream cheese for a few hours to soften before baking the cheesecake. If you use refrigerated cream cheese, you’ll have a lumpy batter, and… ew. Nobody wants random chunks of straight cream cheese when trying to enjoy cheesecake. I really think this is a vital step in cheesecake making to arrive at a smooth filling
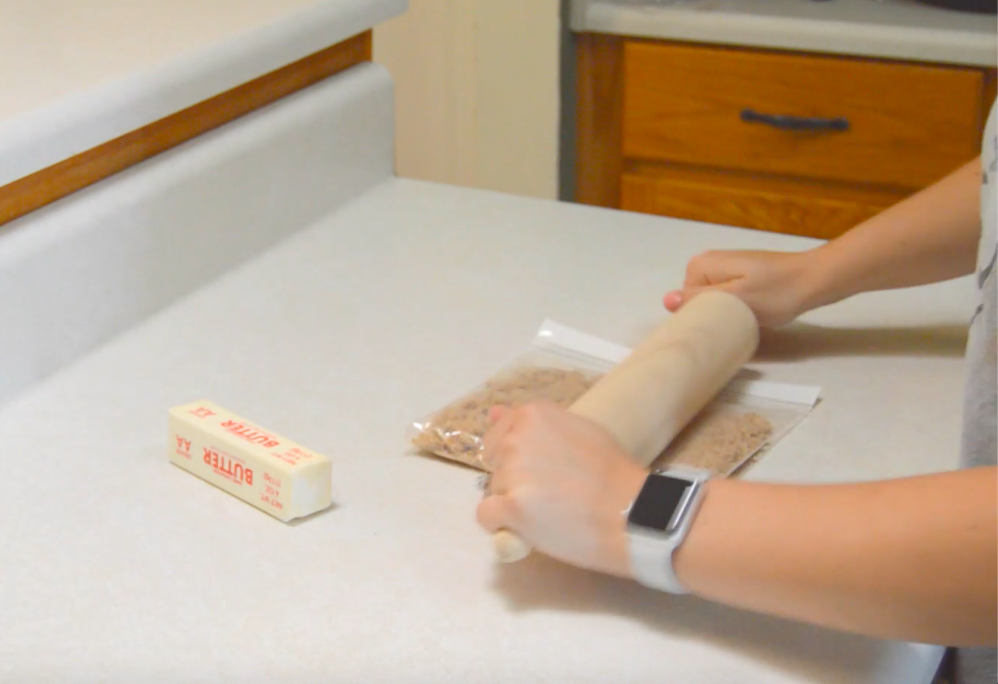
Crumble your graham crackers completely. You can do this in a food processor, or in a ziplock bag with a rolling pin. For this small of a cheesecake, I use about 6 full graham crackers
Melt your unsalted butter and combine with crumbled graham crackers
Spray down your pan with nonstick spray. If you are using a regular cake pan like me, cut and place your two lifting strips into your pan.
Transfer your graham cracker butter mixture to your pans and pack it down with the bottom of a drinking glass (my fav method) or your hands

Place crust into the freezer while you make the filling, or for at least 15 minutes. This allows the crust to harden and stay together better after it is cooked
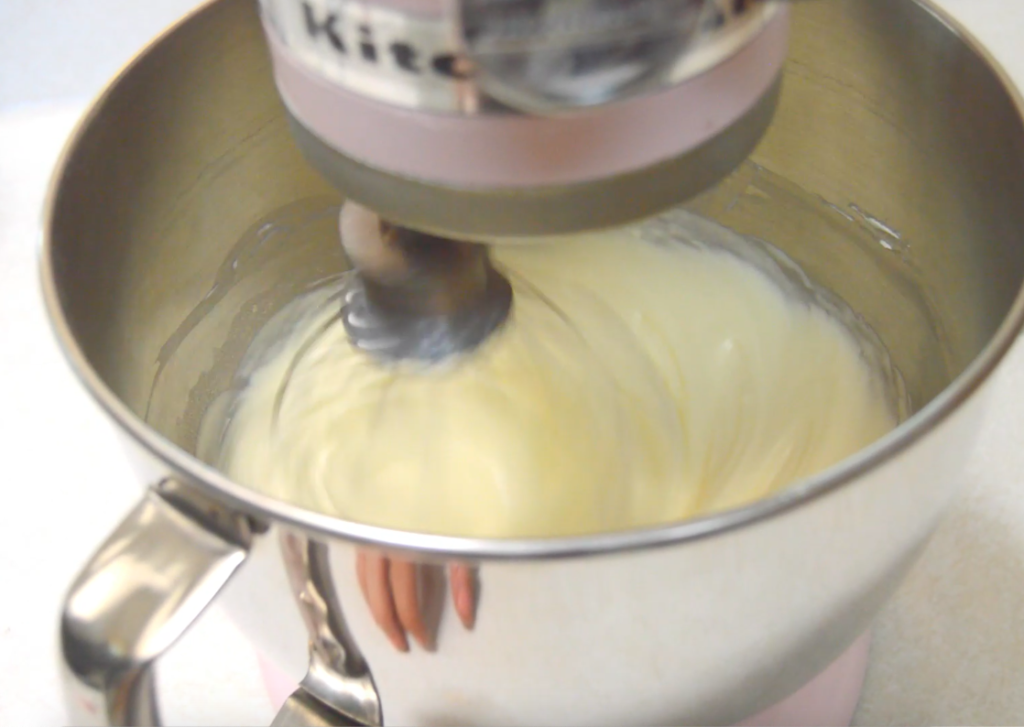
Next add your cream cheese and sugar to a bowl and mix until completely blended.
Add your eggs and vanilla and mix until completely blended. Your filling should be very smooth.
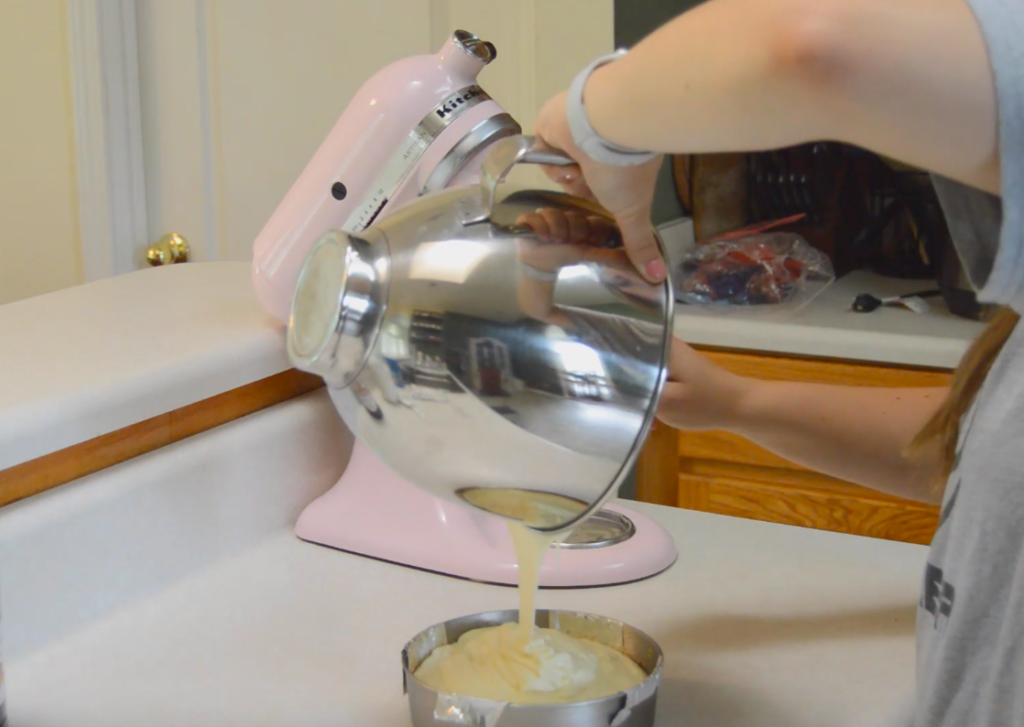
Take your crust out of the freezer and pour in your filling. It’s okay if the filling is filled all the way to the top, this cheesecake does not rise much at all and won’t spill over.
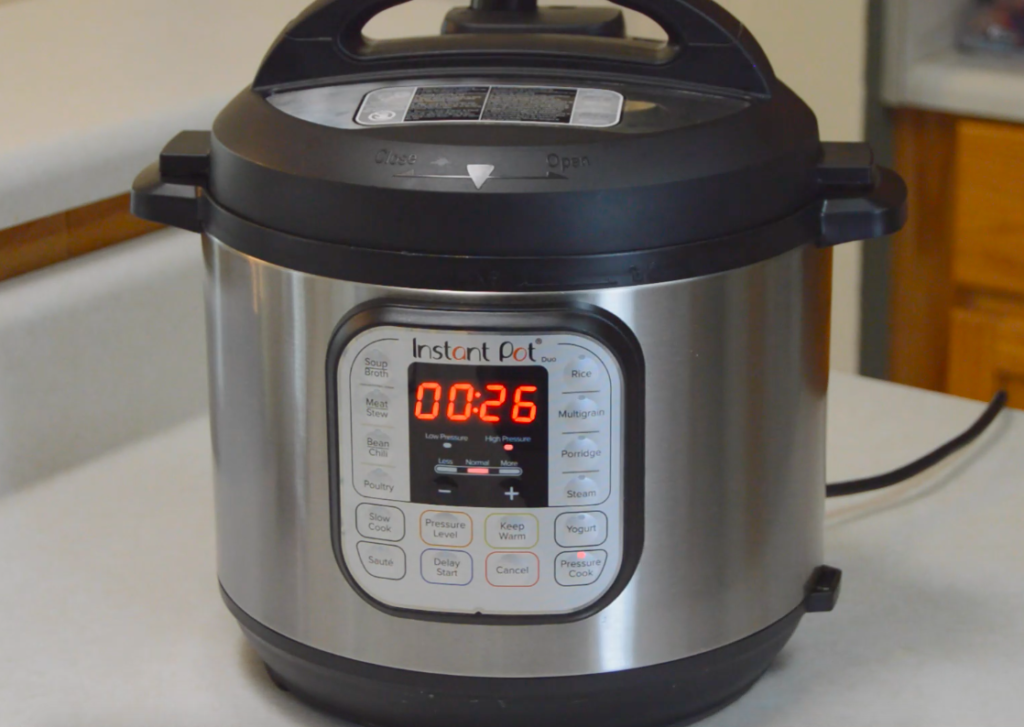
In your Instant pot, add your metal trivet and 1 cup of water directly into the pot
Place your cheesecake pan on top of the trivet and lock your lid to sealing.
Set the Instant Pot to high pressure for 26 minutes.
Once the 26 minutes are up, allow the Instant Pot to naturally release. This usually takes another 25 minutes or so for me. This is a very important step that you can NOT skip. By choosing to naturally release, you are allowing the cheesecake to cook longer. If you manually release the pressure, the cheesecake will stop cooking and could be underdone, just be patient
Allow cheesecake to cool to room temperature, then transfer to the fridge to cool.
Lift the cheesecake out of cake pan with your strips your placed at the beginning and transfer to your storage dish
Allow the cheesecake to cool for at least 4 hours before eating, but it’s always better if you can leave it until the next day.
I used a cake cutter tool to lift my entire cheesecake up in order to remove the lifting strips off. It’s a small enough cheesecake that it isn’t too difficult. The colder the cheesecake, the more solid and less fragile it is, so I recommend doing this after the cheesecake has refrigerated a while
I love this cheesecake completely plain, but you can top it with your favorite berries, chocolate syrup, whipped cream… whatever your heart desires!
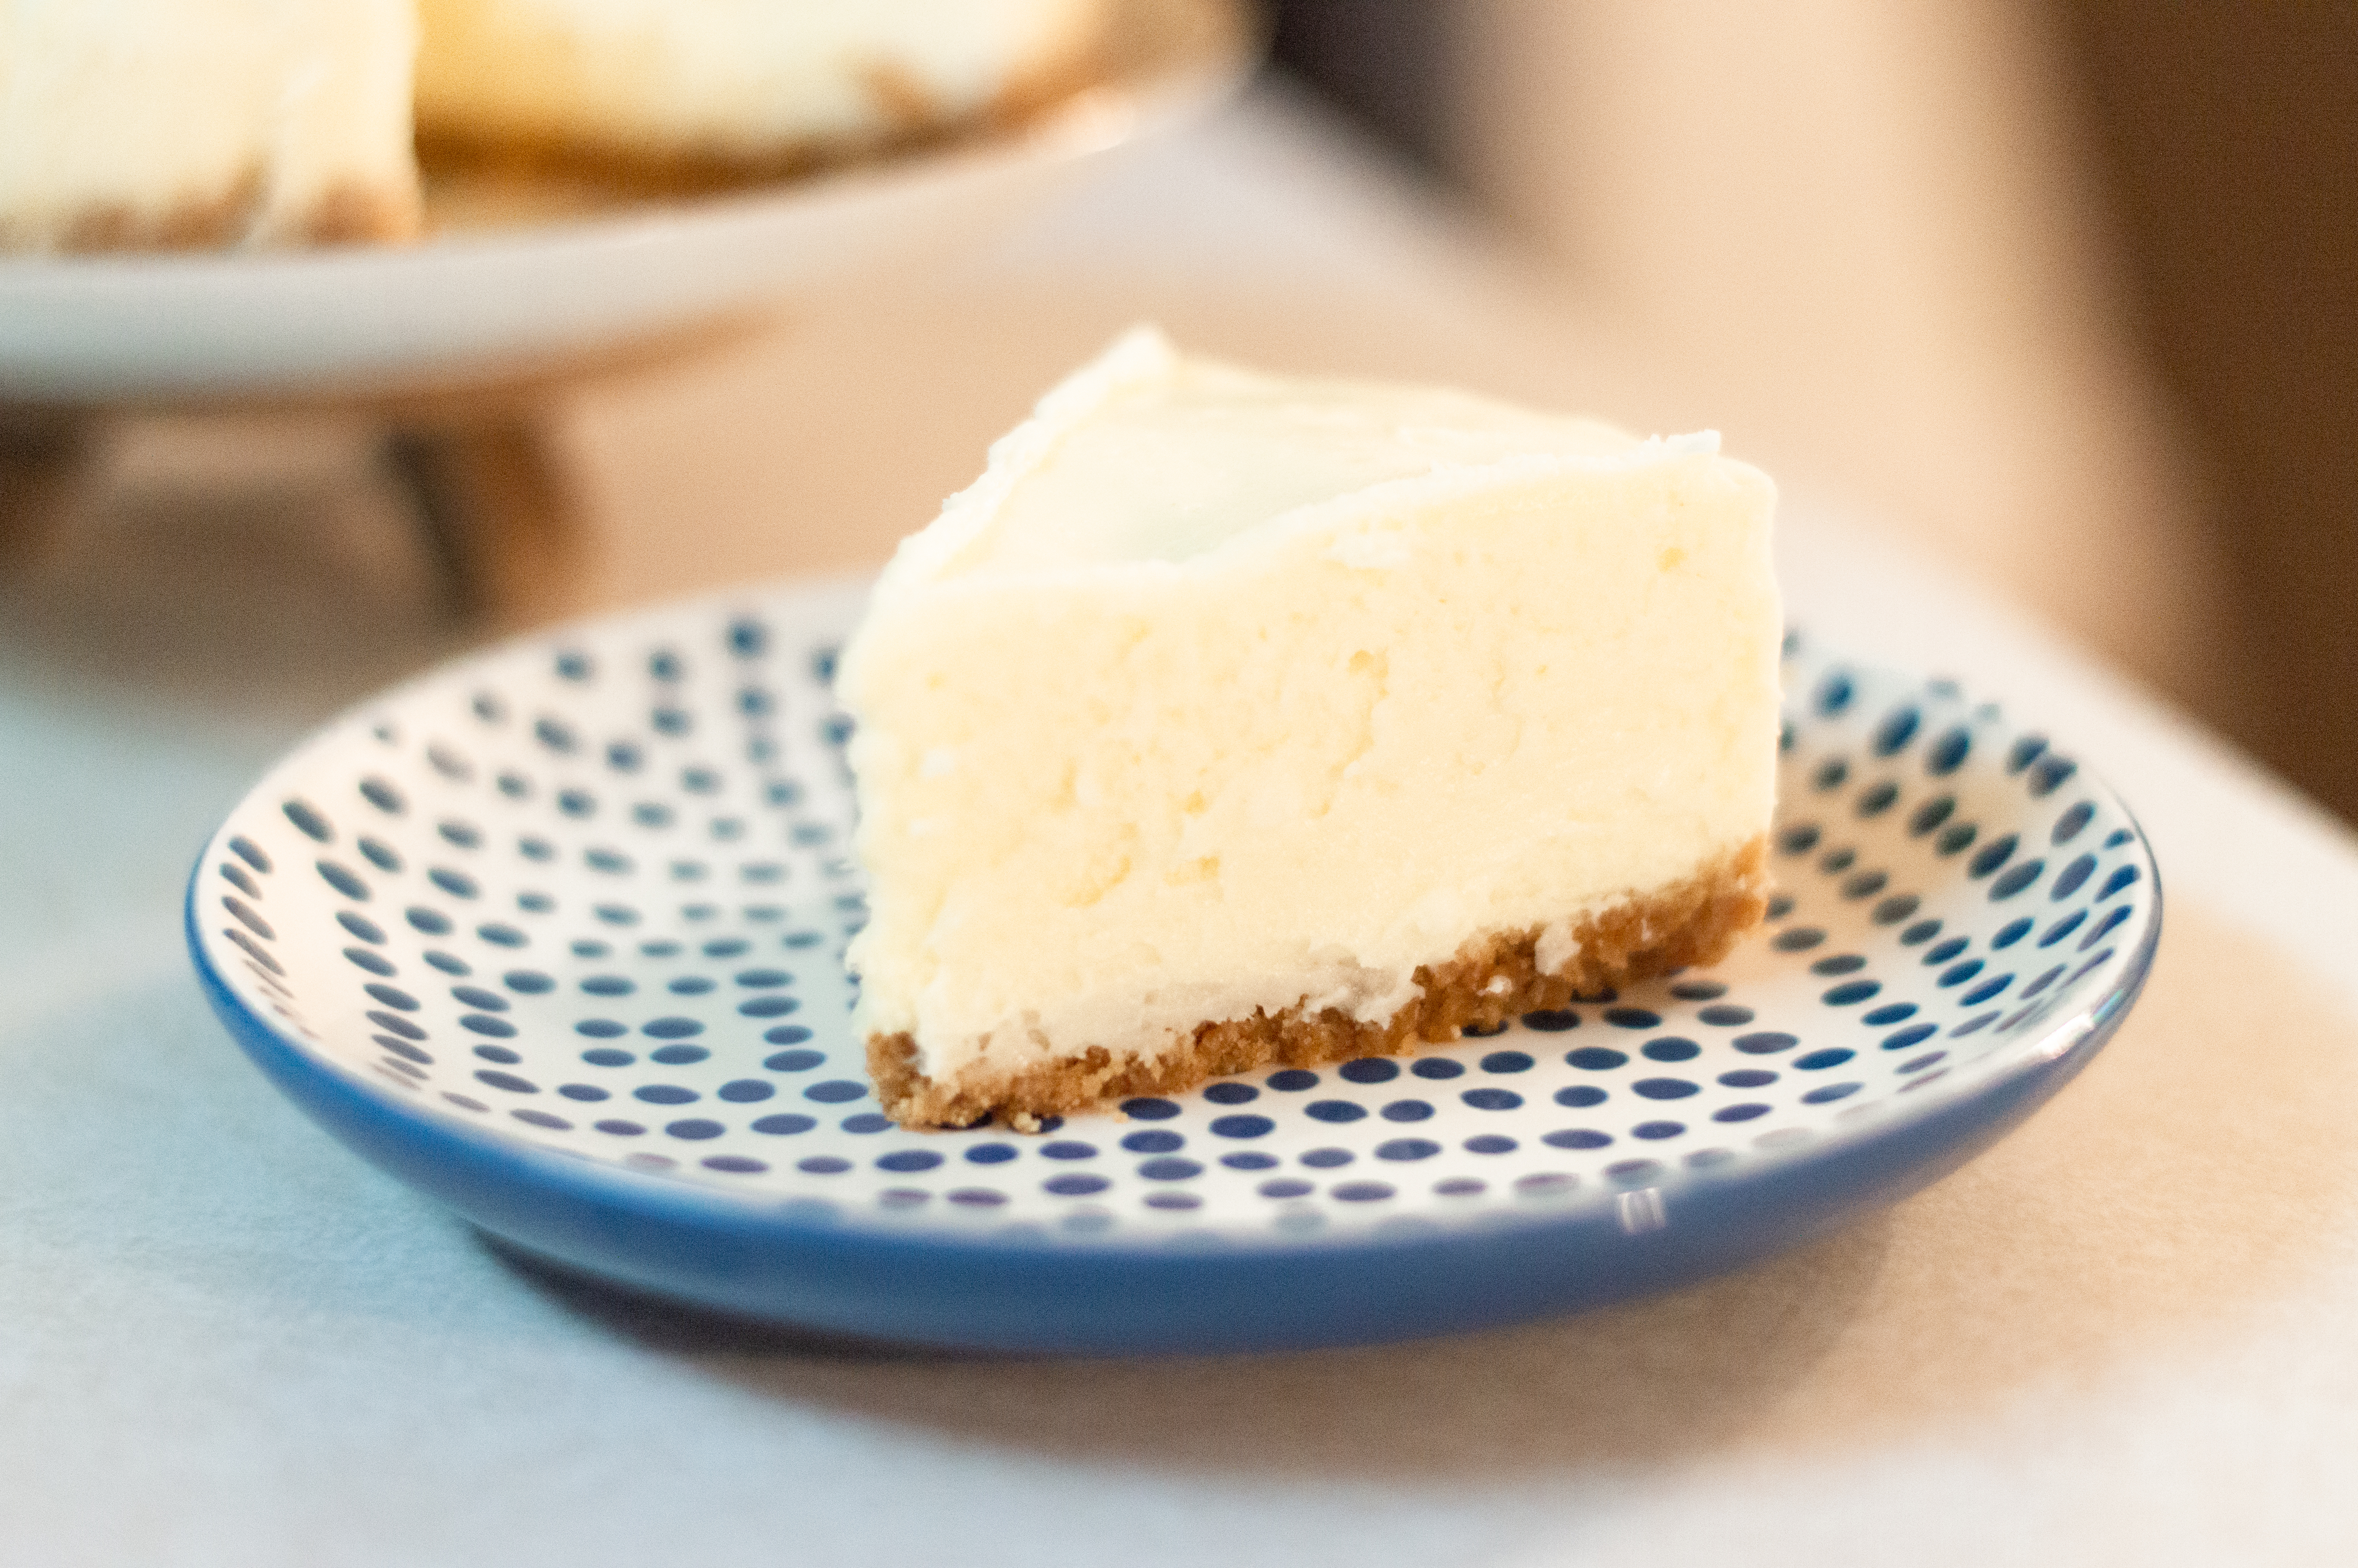
Now, let us look and admire this beauty.

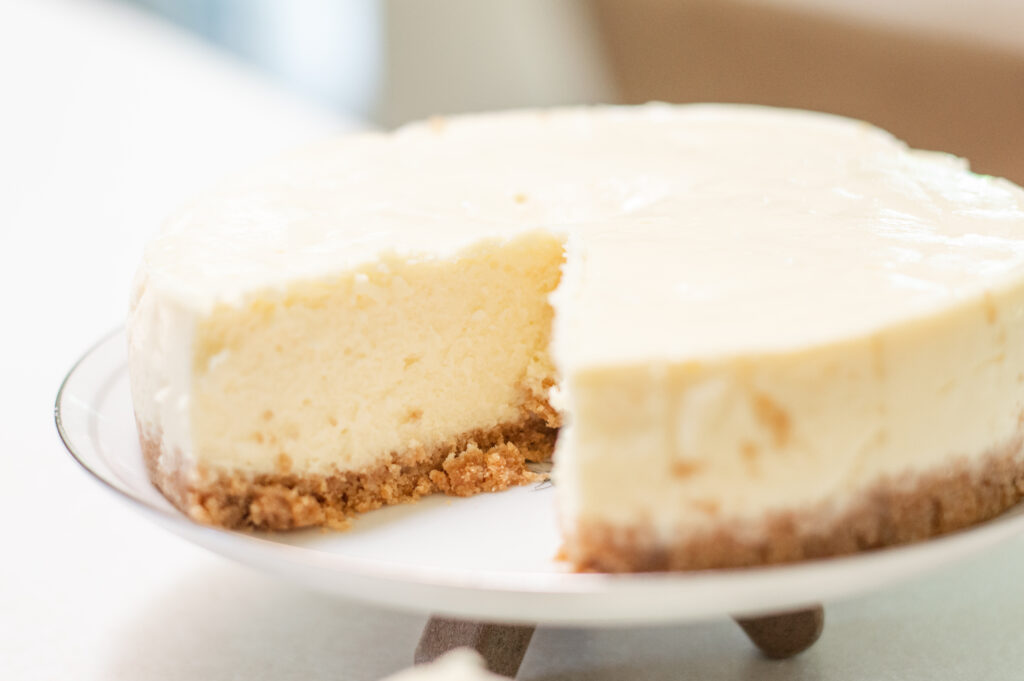

Honestly, look at that gorgeous buttery crust
Instant Pot Cheesecake
8
servings15
minutes26
minutesIngredients
- Crust
6 graham crackers
1/4 cup unsalted butter- melted
- Filling
2 8oz packages cream cheese- softened
2/3 cup sugar
2 eggs
3/4 tsp vanilla extract
Directions
- Crumble graham crackers in food processor or in ziplock bag. Combine graham crackers and melted butter.
- Pour crust into greased pan and pack down. Set in freezer for at least 15 minutes to harden
- Mix together softened cream cheese and sugar until well combined. Add eggs and vanilla, and mix until combined and smooth
- Pour cream cheese mixture into graham cracker crust
- Place metal trivet and 1 cup water into Instant Pot insert. Place cheesecake pan on top of trivet. Lock and seal Instant Pot lid.
- 26 minutes on high pressure. Naturally release. Let cool to room temperature then refrigerate for at least 4 hours. Slice and serve.
Recipe Video
Notes
- Watch the video above to see me make this step-by-step. Make sure to tag me in your Instagram posts when you make this cheesecake @lamaisoncreativeco